So for another class assignment I am given the challenge to create a map. I decided to make the Neverland map from Peter Pan. So far I just have the blocky look going. I'm thinking making a transition from both worlds with London to Neverland. I will see if I keep that look or just focus on Neverland. I created all the element in Maya so far, but I modified the map shape in zbrush. Enjoy!
Illustrations, concept art, character, creature, environment design, VFX, and 3D modelling. Dive into digital art, journals, sketching, painting, comics and insights. Join me as I share my creative process and professional works, taking you along on my artistic journey.
Google analytics tag
Horizontal ad 3
Monday, 25 March 2019
Tuesday, 12 March 2019
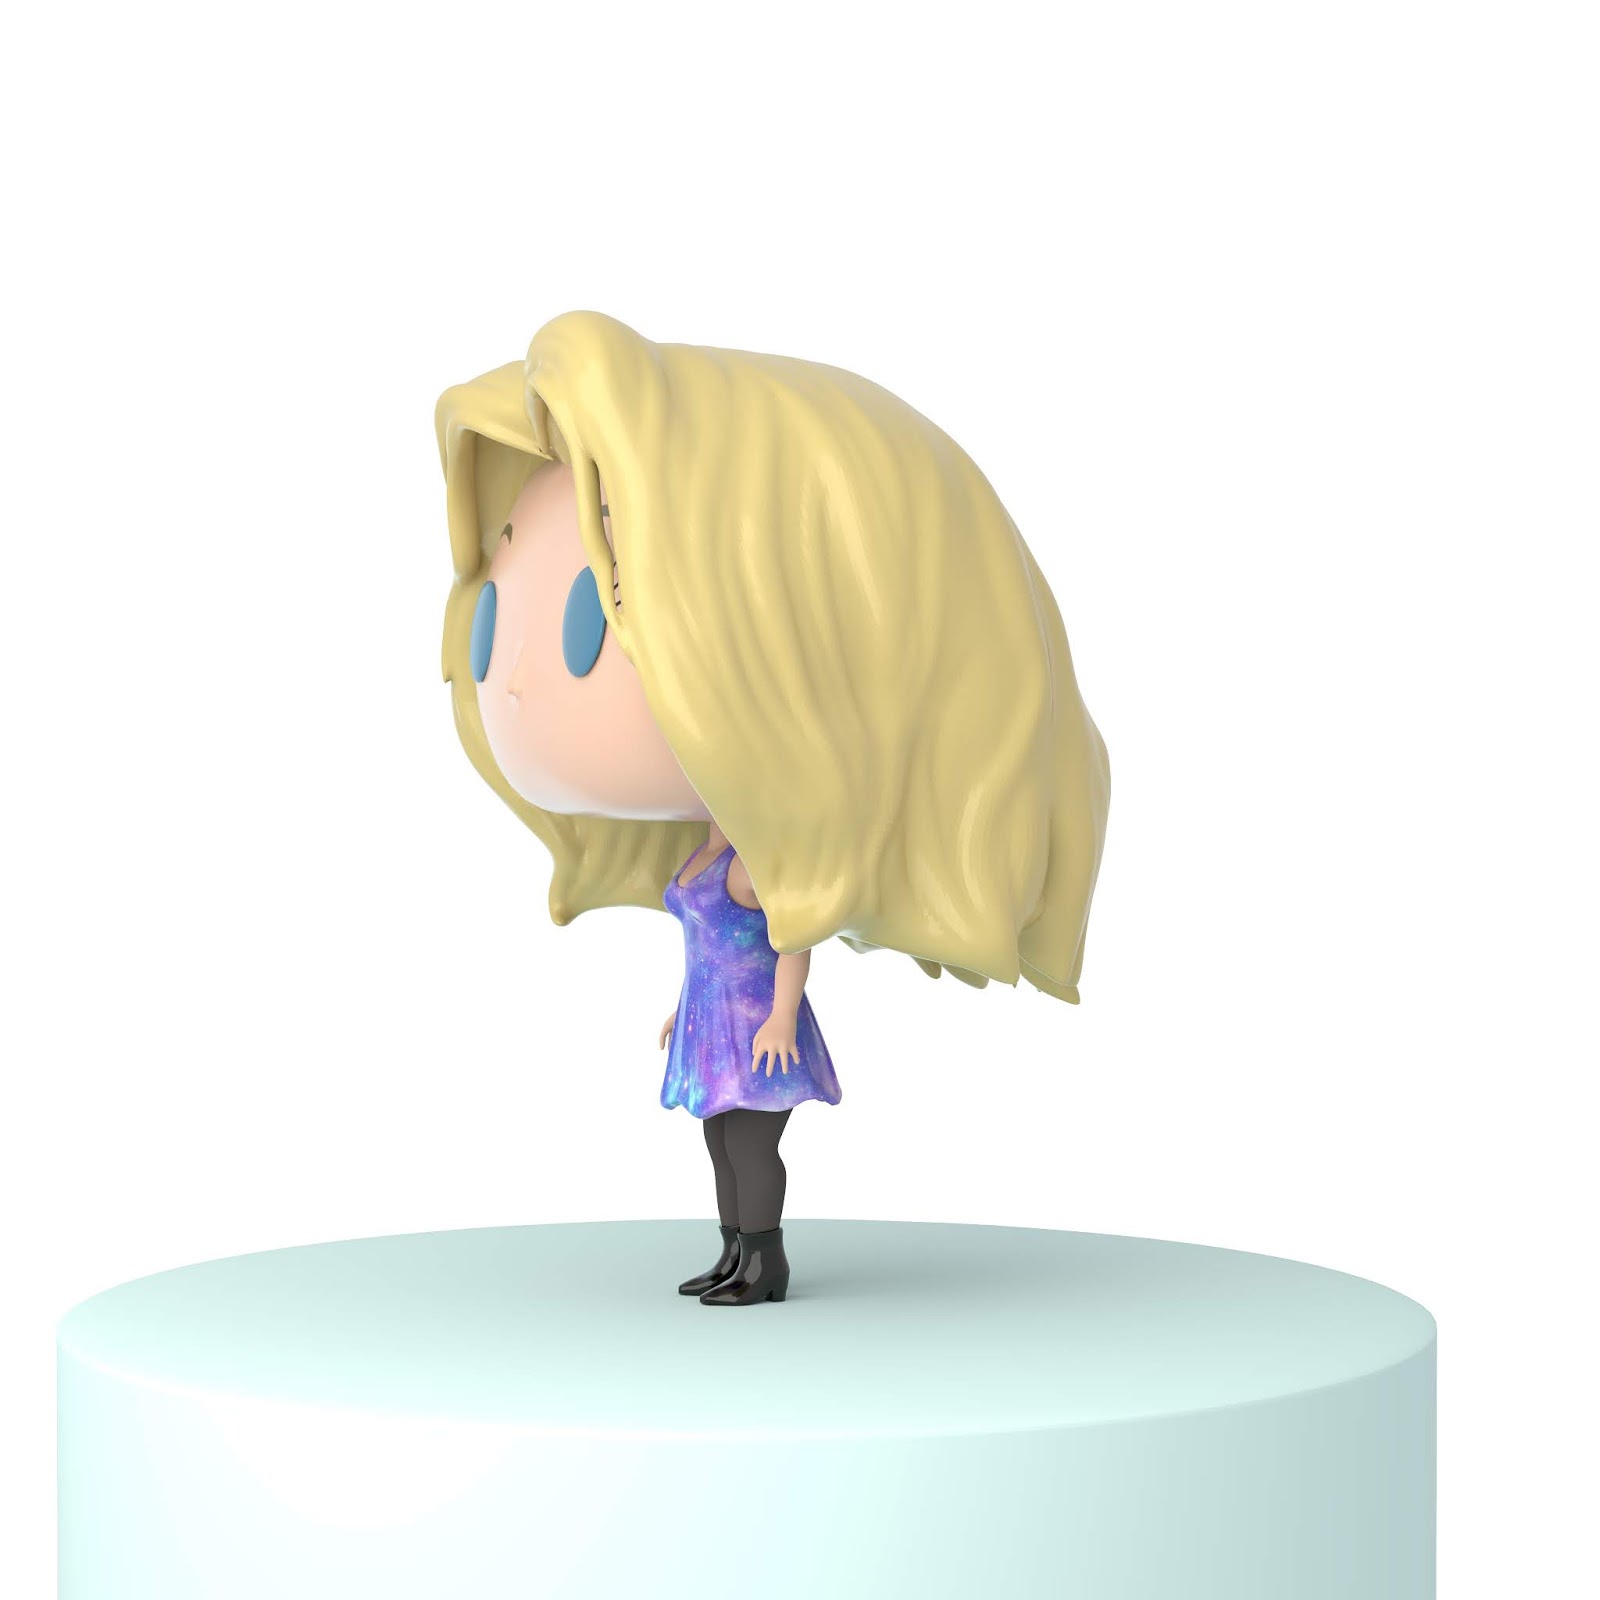
Pop figure of..Me!
So for another class assignment. We were given the challenge of creating a 3d model of myself. It was a fun challenge and I jumped straight into it.
First thing I did was look up some reference of the Funko Pop figures to match the style. Then I jumped into zbrush. This could also be done in maya, but I am more comfortable with modeling organic objects in Zbrush. Also I love Zbrush!
I started off creating 2 separate spheres for the head and body. Those are on separate sub-tools.
For the Lims and fingurs. I sinply masked the areas out and pulled them out using the move tool.
I created separate sub tools for the hair, dress and boots. The dress was created with a mask I drew on the body, then I extracted it under sub-tools.
After painting the colors on in substance painter. I assigned the colors into Maya's Arnold render. Then I did a few renders
Here is my finished outcome. I will put the little me model into an environment in the future. But for now here is the completed render. Enjoy :)
First thing I did was look up some reference of the Funko Pop figures to match the style. Then I jumped into zbrush. This could also be done in maya, but I am more comfortable with modeling organic objects in Zbrush. Also I love Zbrush!
I started off creating 2 separate spheres for the head and body. Those are on separate sub-tools.
For the Lims and fingurs. I sinply masked the areas out and pulled them out using the move tool.
I created separate sub tools for the hair, dress and boots. The dress was created with a mask I drew on the body, then I extracted it under sub-tools.
After painting the colors on in substance painter. I assigned the colors into Maya's Arnold render. Then I did a few renders
Here is my finished outcome. I will put the little me model into an environment in the future. But for now here is the completed render. Enjoy :)
Tuesday, 5 March 2019
Matte Painting a Mushroom Alien world!
So for a matte painting assignment. I was assigned to create a world that has a sci-fi feel. I decided I wanted to create an alien mushroom planet. Because This is a matte painting and it requires photo manipulation. So I went to Pexels and textures.com to mostly get the images that I required.
Then I went on to work on some simple thumbnails to work out the composition and some perspective. It doesn't have to be perfect at this point, just get the basic look and feel.
Then after putting together images in photoshop and editing the images to match the color and perspective. It was a lot of push and pull getting the composition and images to look just right. I didn't end up following the compositions I drew up in my thumbnails exactly and that's Ok. Its a process. Here is what I have so far.
This is a photo manipulation matte painting so I do not own the right to the photos
Then I went on to work on some simple thumbnails to work out the composition and some perspective. It doesn't have to be perfect at this point, just get the basic look and feel.
Then after putting together images in photoshop and editing the images to match the color and perspective. It was a lot of push and pull getting the composition and images to look just right. I didn't end up following the compositions I drew up in my thumbnails exactly and that's Ok. Its a process. Here is what I have so far.
This is a photo manipulation matte painting so I do not own the right to the photos
Monday, 25 February 2019
Gummy Bear Renders!
So after lots of trial and error with rendering programs. I decided to import my scene into Maya and render in Arnold. I was finally able to get the gummy texture with no noise with a quick render time. The background and lighting is from a HDRI I found online. I'm planning to still work on some touch ups with the lighting, table and environment but here is what I have!
You can view the whole process on my website here
Tuesday, 19 February 2019
Modelling frog creatue design part 1
For my modelling class, I am working on a creature design. I always wanted to model a frog. Now surprise fort those who know me.it's one of my favorite animals.
I started with collecting lots of reference and I decided I will be basing my design after a green tree frog. I started modeling from a sphere in z brush and just getting the basic pose and shapes.
Working in many views helps in order to get the views or your creature looking the correct. I created subtools for the eyes.
I wanted this creature to be a mix of butterfly and tree frog so I added some wings as well as fins at the ends of the tails.
I added some bumpy texture for the skin to give the creature more realism.
Now to finish my re-topology and I am off to texturing and colors!
You can check out the whole process on my website here
I started with collecting lots of reference and I decided I will be basing my design after a green tree frog. I started modeling from a sphere in z brush and just getting the basic pose and shapes.
Part of the project is to create a made up creature. So I took the liberty in adding tails for my frog.
Then I just worked on the hands and feet as well as refining the shapes.
I added some bumpy texture for the skin to give the creature more realism.
Now to finish my re-topology and I am off to texturing and colors!
You can check out the whole process on my website here
Monday, 18 February 2019
CGI gummy bears part 2
So been working on my gummy bears some more. I saved an animation done in Houdini of the gummy bears falling into a bowl.
I am currently rendering the candy and bowl inside of The Houdini rendered Mantra.
Still a work in progress, I'm playing around with the lighting and shadows. But those gummy bears are looking more edible! :)
I am currently rendering the candy and bowl inside of The Houdini rendered Mantra.
You can view the whole process on my website here
Tuesday, 12 February 2019
CGI gummy bears anyone?
So for this assignment I am creating candy good enough to eat! I chose gummy bears since I like their interesting shapes and thought it would be a fun challenge to recreate that soft, transparent texture. I started off getting the basic shape in Maya.
After I finished my details I re-topologized the model to keep the poly count as low as possible with the desired detail.
After I was happy with the result. I put it into Houdini
I created multiples of the same geometry and added a bowl. Now I'm off to texturing. Stay tuned!
After I got the basic shape in, I decided to throw the model into Zbrush to get the smooth organic details.
You can view the whole process on my website here
Subscribe to:
Posts (Atom)