Hello everyone, here is some environment work I created in Unreal Engine 5. I did the set dressing, painted and sculpted the landscape. Set up the lighting, camera, and materials. The trees (European Black Alder), textures and rocks are asset packs from FAB.
Showing posts with label 3D. Show all posts
Showing posts with label 3D. Show all posts
Wednesday, 28 May 2025
Wednesday, 15 January 2025
Crystal Cave 3D Environment
This is from my crystal cave project. This is based on a digital painting I did a couple of years back. The piece was popular among my viewers. So, I created a 3D environment based on it in Unreal 5. I designed the environment and did some modelling, texturing, and material creation. Along with using some assets from Fab.


Video:
Images can be viewed here:
My process:
Saturday, 11 January 2025
Professional achievements
So I'm sharing some of my professional accomplishments today. I finally got to see “Mufasa The Lion King”. Where I worked as a previs key layout artist. Some great visuals in this film! Watching the scenes brought up a flood of memories of all the hours of work that we put in. Seeing it finished felt like such a sense of completion. It was really nice to see my name in the credits at the end. I'm really grateful for this experience and the teams I got to work with.


Thursday, 13 June 2019
Spaceship revised
Hey everyone! Sorry for the slow posts, been crazy busy at school. Lots of exciting projects coming! I took the time to revisit my space ship and change the colors and textures a bit as well as creating a turn table.


Here is the turn table including the typology.
To see my whole process. You can check it out on my website Here


Here is the turn table including the typology.
To see my whole process. You can check it out on my website Here
Wednesday, 1 May 2019
Frog creature design complete
So I finally finished the renders on my Fairy frog that I have been working on in school. My process involves:
1.Starting the model in Zbrush.
2. Importing the finished Zbrush model to be retypologized in Maya, then UVed.
3. Bringing retypologized model back in Zbrush to project onto the original model. This enables all the details and textures but with better typology.
4. In Zbrush I exported displacement masks for the subdivided retypoligized model.
5. I then brough in my retypoligized model into substance painter for painting and textures.
6. The exporting the substance painter paint and textures back into Maya and rendered in Arnold.
Learned a lot on this project and looking forward to making more more and learning more!


You can check out the whole process on my website here
1.Starting the model in Zbrush.
2. Importing the finished Zbrush model to be retypologized in Maya, then UVed.
3. Bringing retypologized model back in Zbrush to project onto the original model. This enables all the details and textures but with better typology.
4. In Zbrush I exported displacement masks for the subdivided retypoligized model.
5. I then brough in my retypoligized model into substance painter for painting and textures.
6. The exporting the substance painter paint and textures back into Maya and rendered in Arnold.
Learned a lot on this project and looking forward to making more more and learning more!


Tuesday, 2 April 2019
Neverland map Part 2!
So after taking some time to get the modeling texturing and rendering out here is what I did!


I wanted to go for a toy, cartoony look so I kept the models relatively simple and kept the colors bright and happy.
The island started off as a Maya model which I later imported into zbrush to give it a more organic look. I was originally planning to use Houdini height field for the map. However I found that because I was going for a cartoon stylized look. I decided to stick with zbrush.
The colors have also been done in zbrush spot light tool, to get the more textured parts. As for the simpler parts that only have flat color I used Maya colored shaders.
I had a lot of fun building this little world and would love to improve upon it. Coming from a background as a background painter, I really enjoy creating worlds, makes me feel like a kid playing with Lego all over again!
More of my 3D work can be viewed here
Monday, 25 March 2019
Nerverland map
So for another class assignment I am given the challenge to create a map. I decided to make the Neverland map from Peter Pan. So far I just have the blocky look going. I'm thinking making a transition from both worlds with London to Neverland. I will see if I keep that look or just focus on Neverland. I created all the element in Maya so far, but I modified the map shape in zbrush. Enjoy!


Tuesday, 12 March 2019
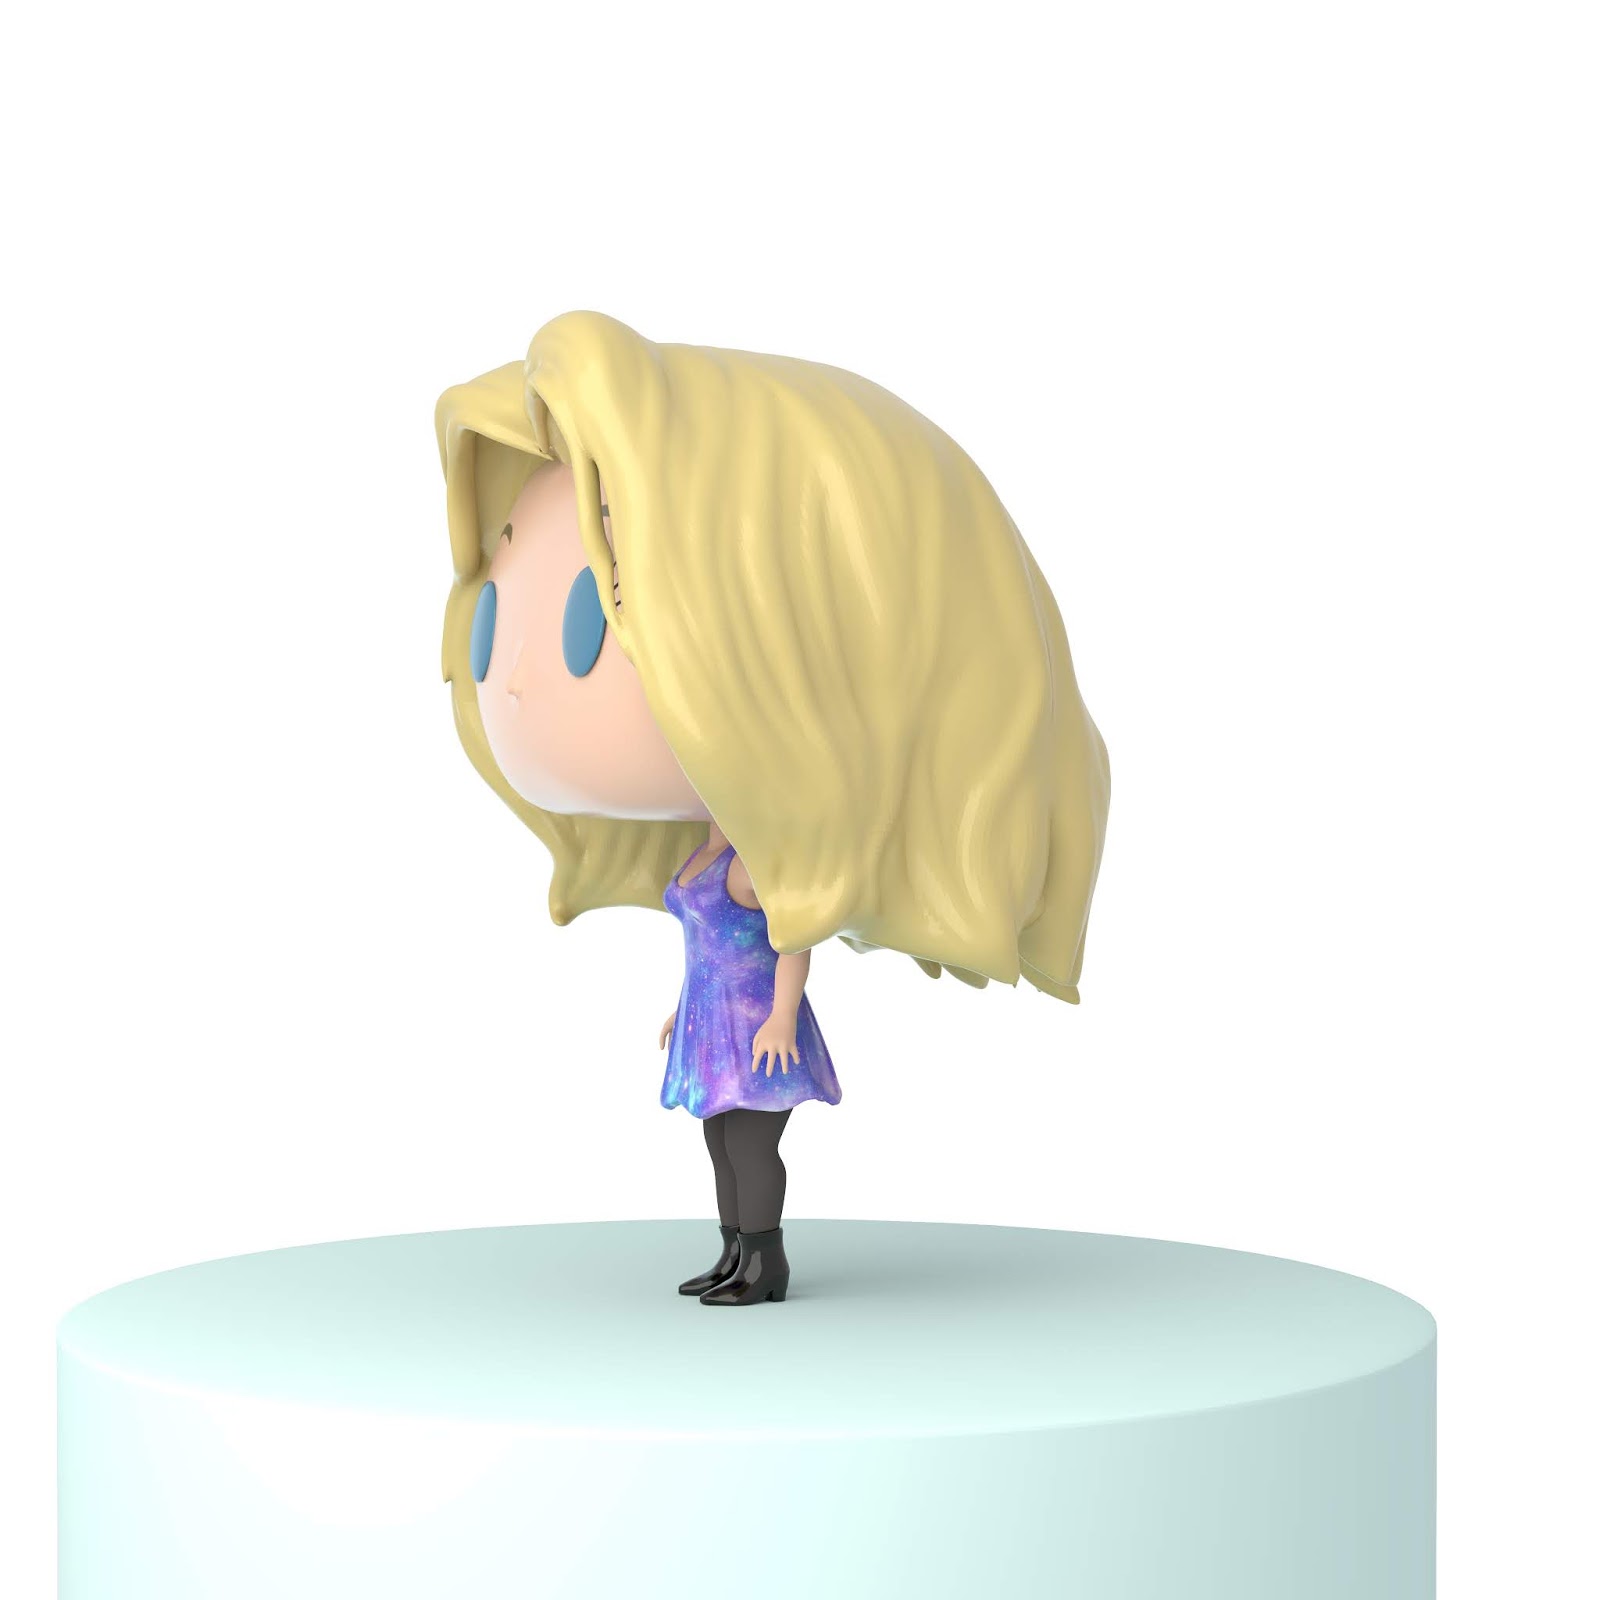
Pop figure of..Me!
So for another class assignment. We were given the challenge of creating a 3d model of myself. It was a fun challenge and I jumped straight into it.
First thing I did was look up some reference of the Funko Pop figures to match the style. Then I jumped into zbrush. This could also be done in maya, but I am more comfortable with modeling organic objects in Zbrush. Also I love Zbrush!
I started off creating 2 separate spheres for the head and body. Those are on separate sub-tools.


 For the Lims and fingurs. I sinply masked the areas out and pulled them out using the move tool.


 I created separate sub tools for the hair, dress and boots. The dress was created with a mask I drew on the body, then I extracted it under sub-tools.
 After painting the colors on in substance painter. I assigned the colors into Maya's Arnold render. Then I did a few renders


 Here is my finished outcome. I will put the little me model into an environment in the future. But for now here is the completed render. Enjoy :)
First thing I did was look up some reference of the Funko Pop figures to match the style. Then I jumped into zbrush. This could also be done in maya, but I am more comfortable with modeling organic objects in Zbrush. Also I love Zbrush!
I started off creating 2 separate spheres for the head and body. Those are on separate sub-tools.




Monday, 25 February 2019
Gummy Bear Renders!
So after lots of trial and error with rendering programs. I decided to import my scene into Maya and render in Arnold. I was finally able to get the gummy texture with no noise with a quick render time. The background and lighting is from a HDRI I found online. I'm planning to still work on some touch ups with the lighting, table and environment but here is what I have!


You can view the whole process on my website here
Subscribe to:
Posts (Atom)